Git Integration
Xed-Editor comes with a built-in Git client that lets you manage your source code directly within the app. You can track changes, commit work, and sync with remote repositories like GitHub without ever leaving the editor.
Getting Started
To use the Git features, simply open a project folder that contains a .git repository. Xed-Editor will automatically detect it and show the Git icon in the side drawer (at the bottom as a service tab).
Configuring Your Identity
Before you make your first commit, you should tell Git who you are. This information is saved in your commits so others know who wrote the code.
- Go to Settings → Git.
- Tap on User data.
- Enter your Name and Email.
TIP
If you are using GitHub and you don't want to expose your email address, you can obtain an anonymous noreply email and use it here.
Connecting to GitHub (Credentials)
If you want to authenticate with GitHub, for example to push changes or access private repositories, you need to configure your credentials.
- In Settings > Git, tap on Credentials.
- Enter your Username (your GitHub username).
- Enter your Personal Access Token (PAT).
If you don't know how to create a PAT, check out this guide.
IMPORTANT
GitHub no longer supports account passwords for Git over HTTPS. You have to use a Personal Access Token (PAT) instead.
The Git Drawer
Once a repository is detected, a new Git service tab appears in the side drawer. This is your interface for all Git operations.
Tracking Changes
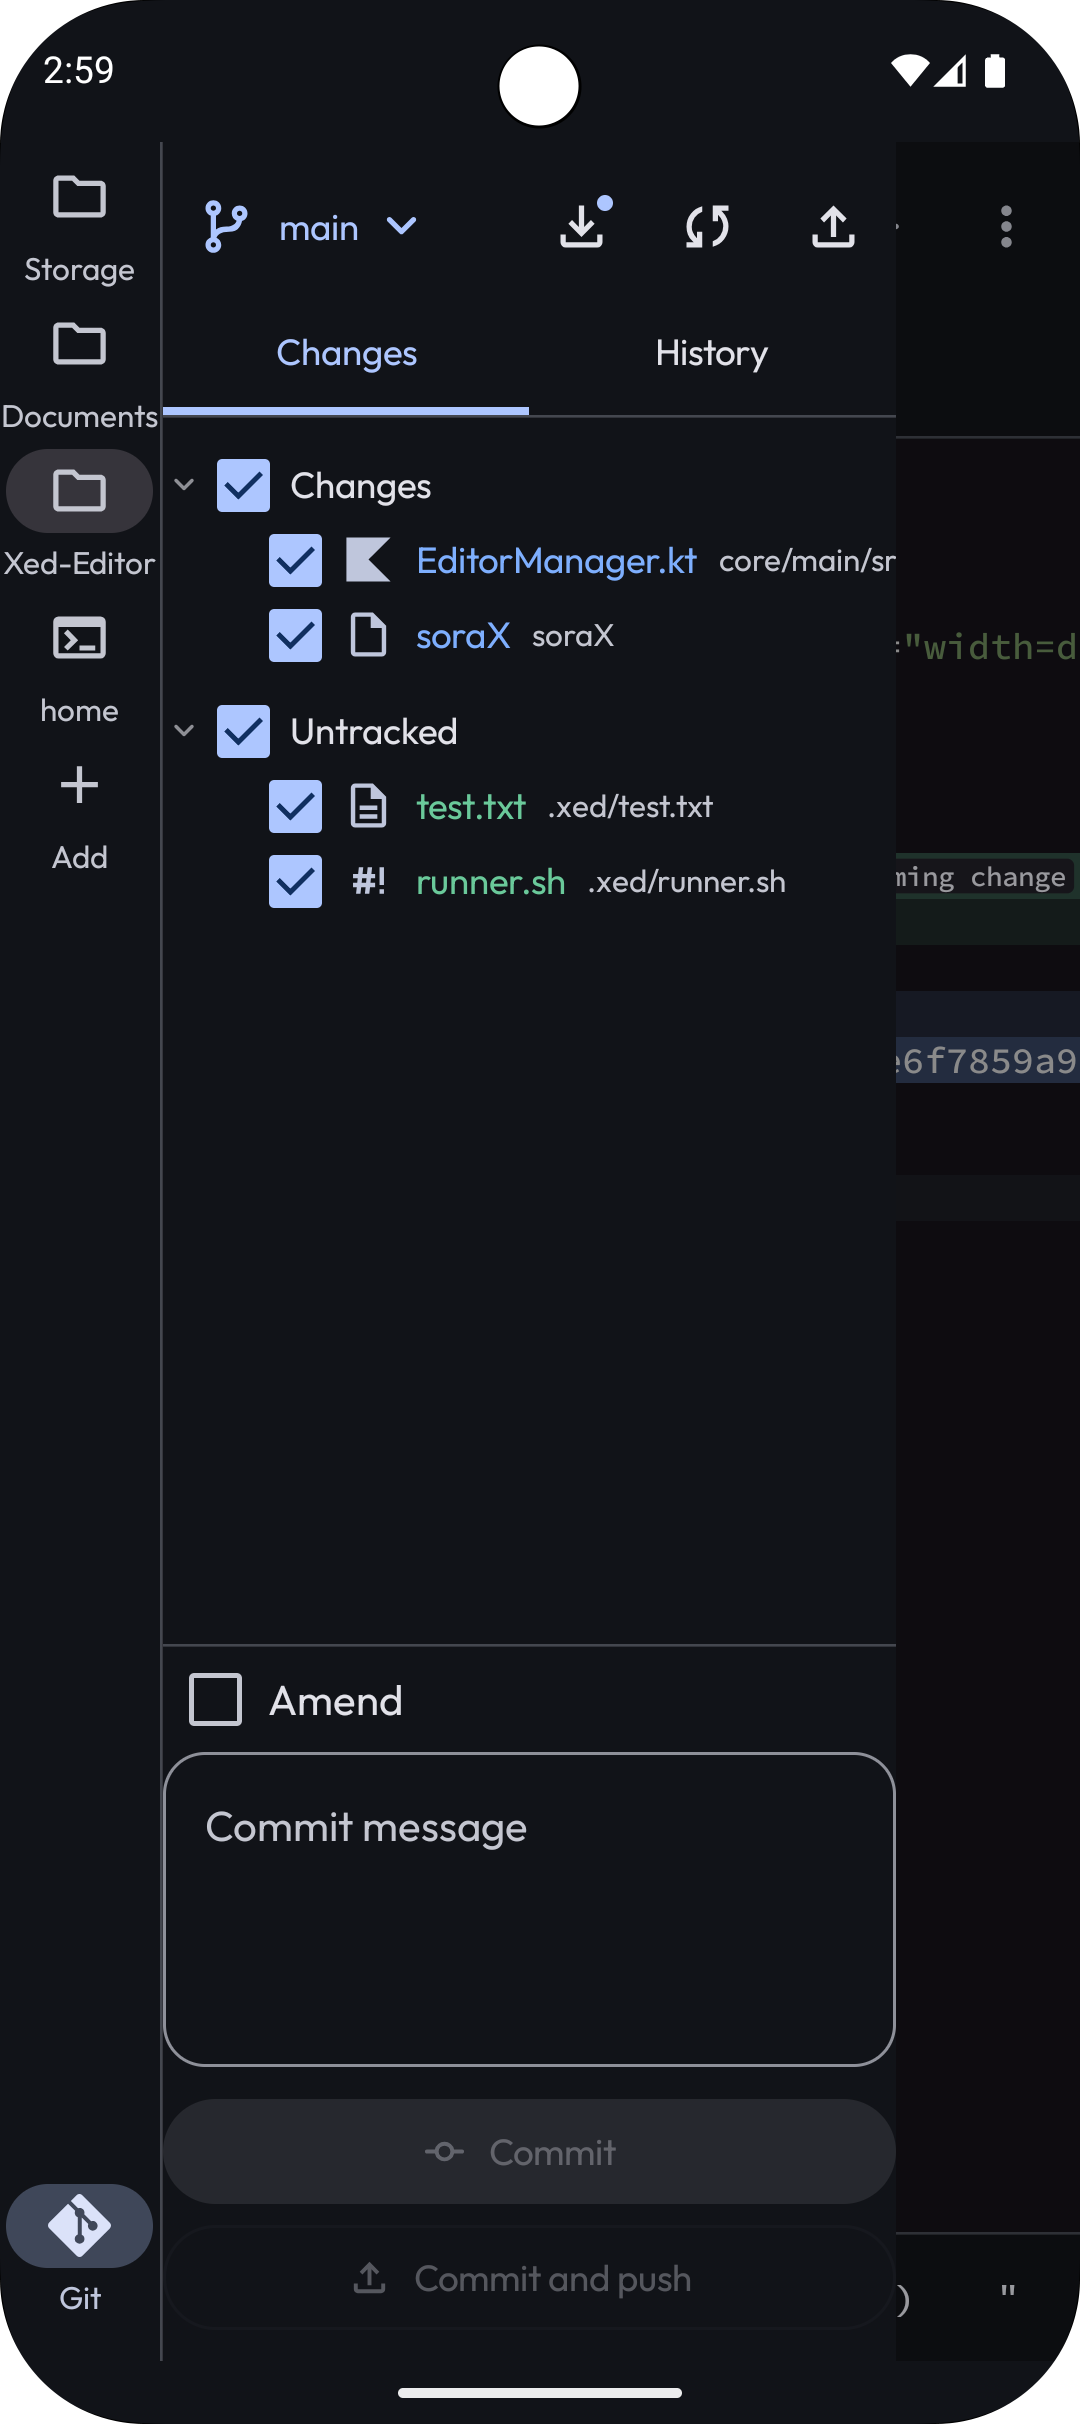
In the Changes section, you can see all the files you have modified, added, or deleted.
Files with conflicts (e.g. merge conflicts) are also displayed there.
- View Diffs: Tap on any file to see exactly what lines have changed compared to the last commit.
- Discard Changes: Long-press a file if you want to undo your changes and revert it to its previous state.
- Staging: Use the checkboxes next to the files to select which changes you want to include in your next commit.
Committing Work
Once you have staged your changes, enter a descriptive Commit Message in the text box at the bottom of the drawer.
- Commit: Tap the commit button to save your changes to the local history.
- Amend: If you made a mistake in your last commit, check the Amend box before committing again. This will merge your new changes into the previous commit instead of creating a new one.
Toolbar Actions
At the top of the Git drawer, you will find buttons for common remote operations:
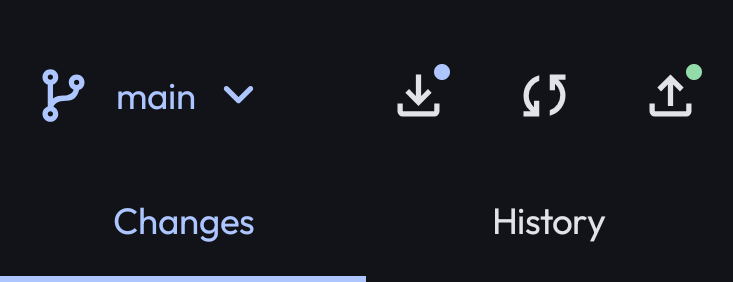
- Pull (left): Download the latest changes from the remote server and merge them into your branch.
- Push (middle): Upload your local commits to the remote server.
- Fetch (right): Check the remote server for updates without merging them yet.
INFO
Look for small circles (badges) on the Pull and Push icons. They tell you exactly if you are behind and/or ahead of the remote server.
Branch Management
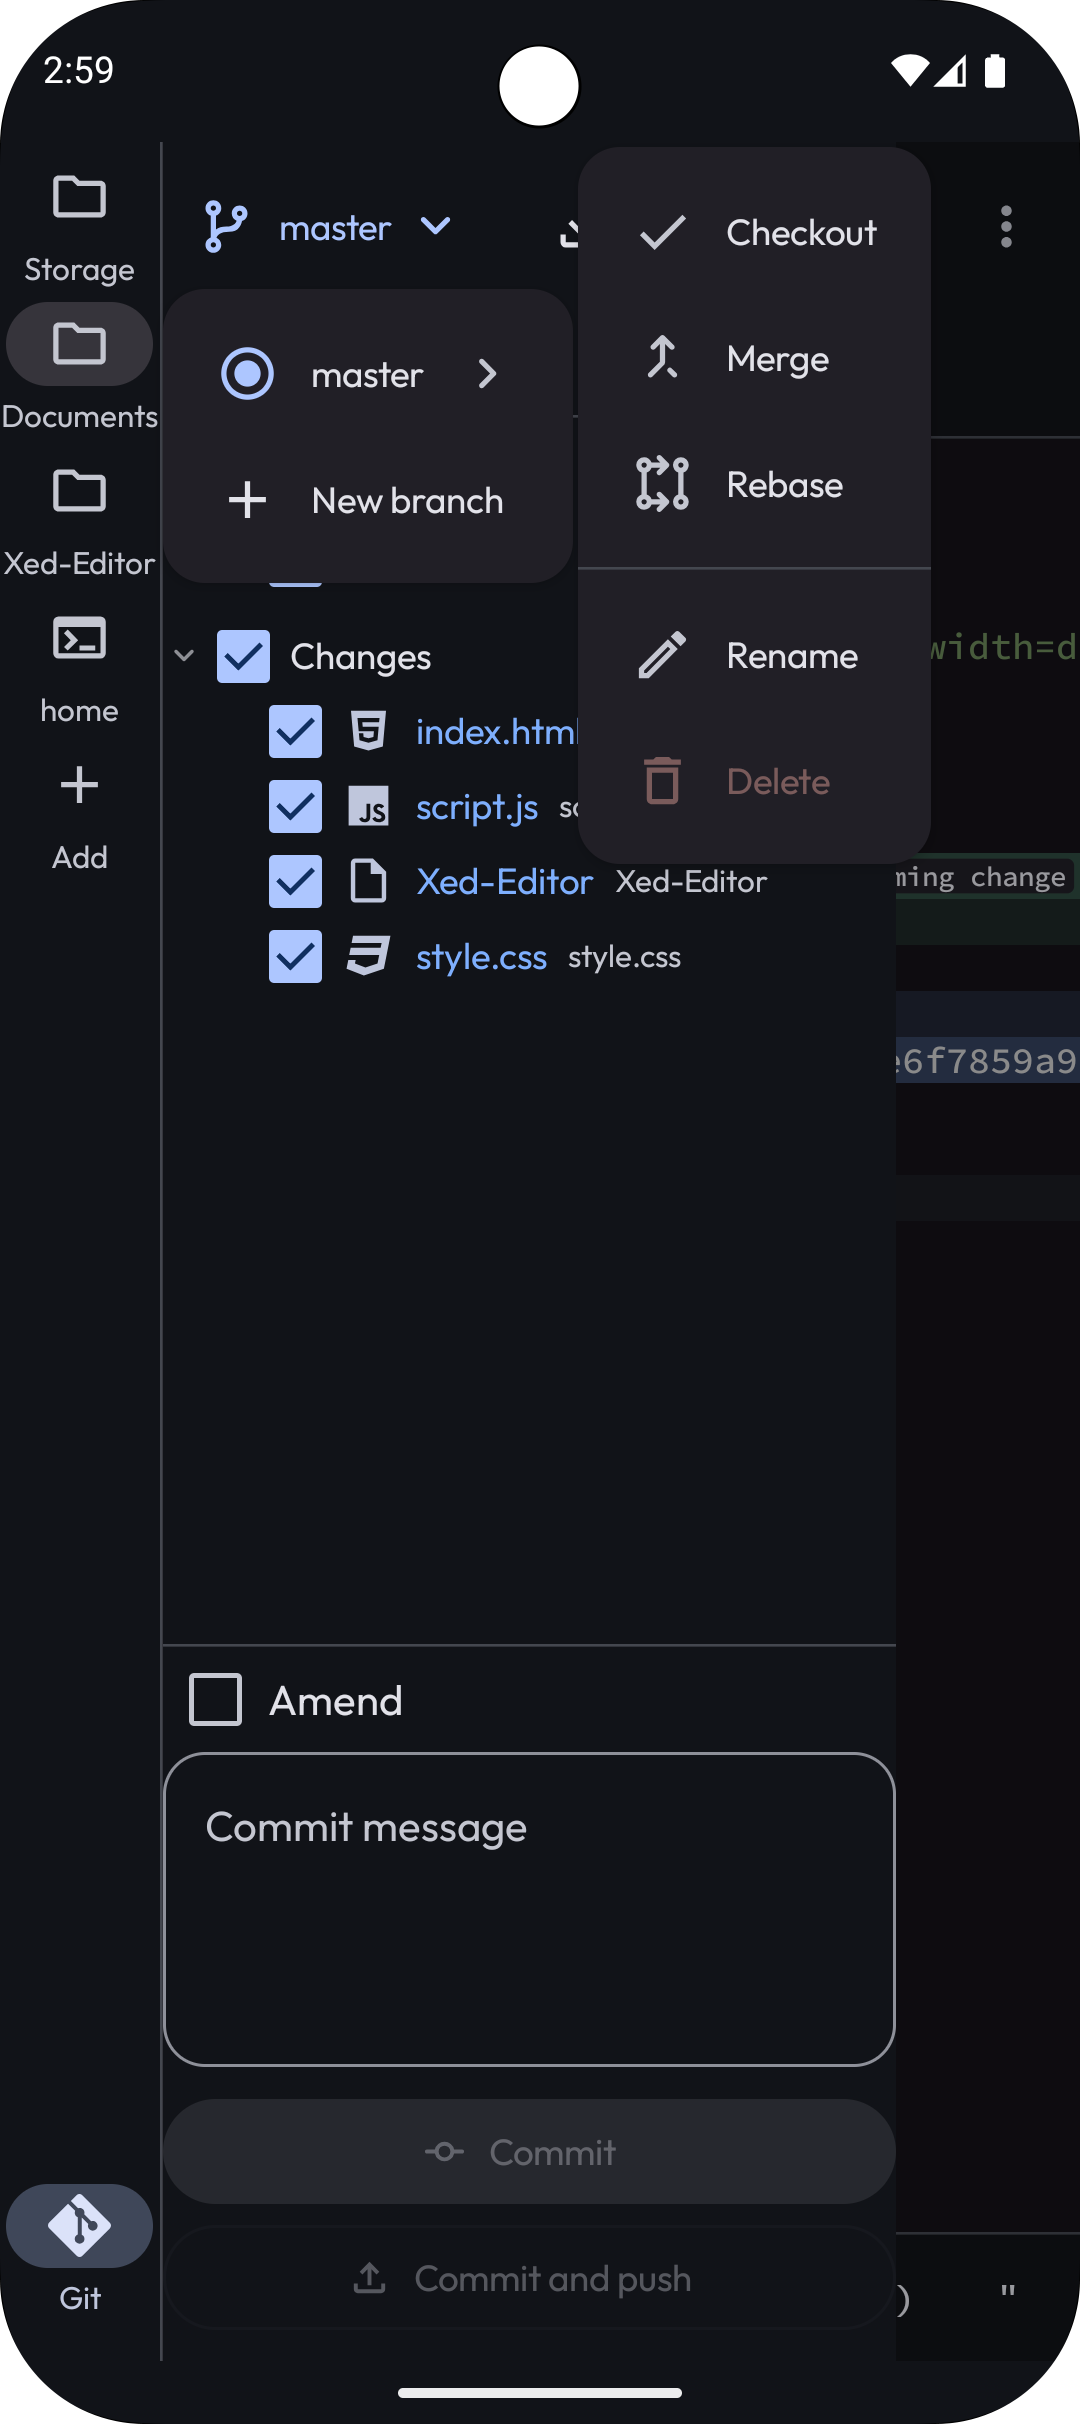
You can manage your branches directly from the top toolbar of the Git drawer. Tap on the current branch name to open the branch menu.
- Create: Tap the + icon to create a new branch.
- Options: Tap on any branch to open a submenu with more options:
- Checkout: Select the option
Checkoutto switch to this branch. - Rename: Select the option
Renameto change the name of the branch. - Delete: Select the option
Deleteremove the branch. - Merge/Rebase: You can also initiate
MergeorRebaseoperations from this menu to combine work from different branches.
- Checkout: Select the option
Git Graph
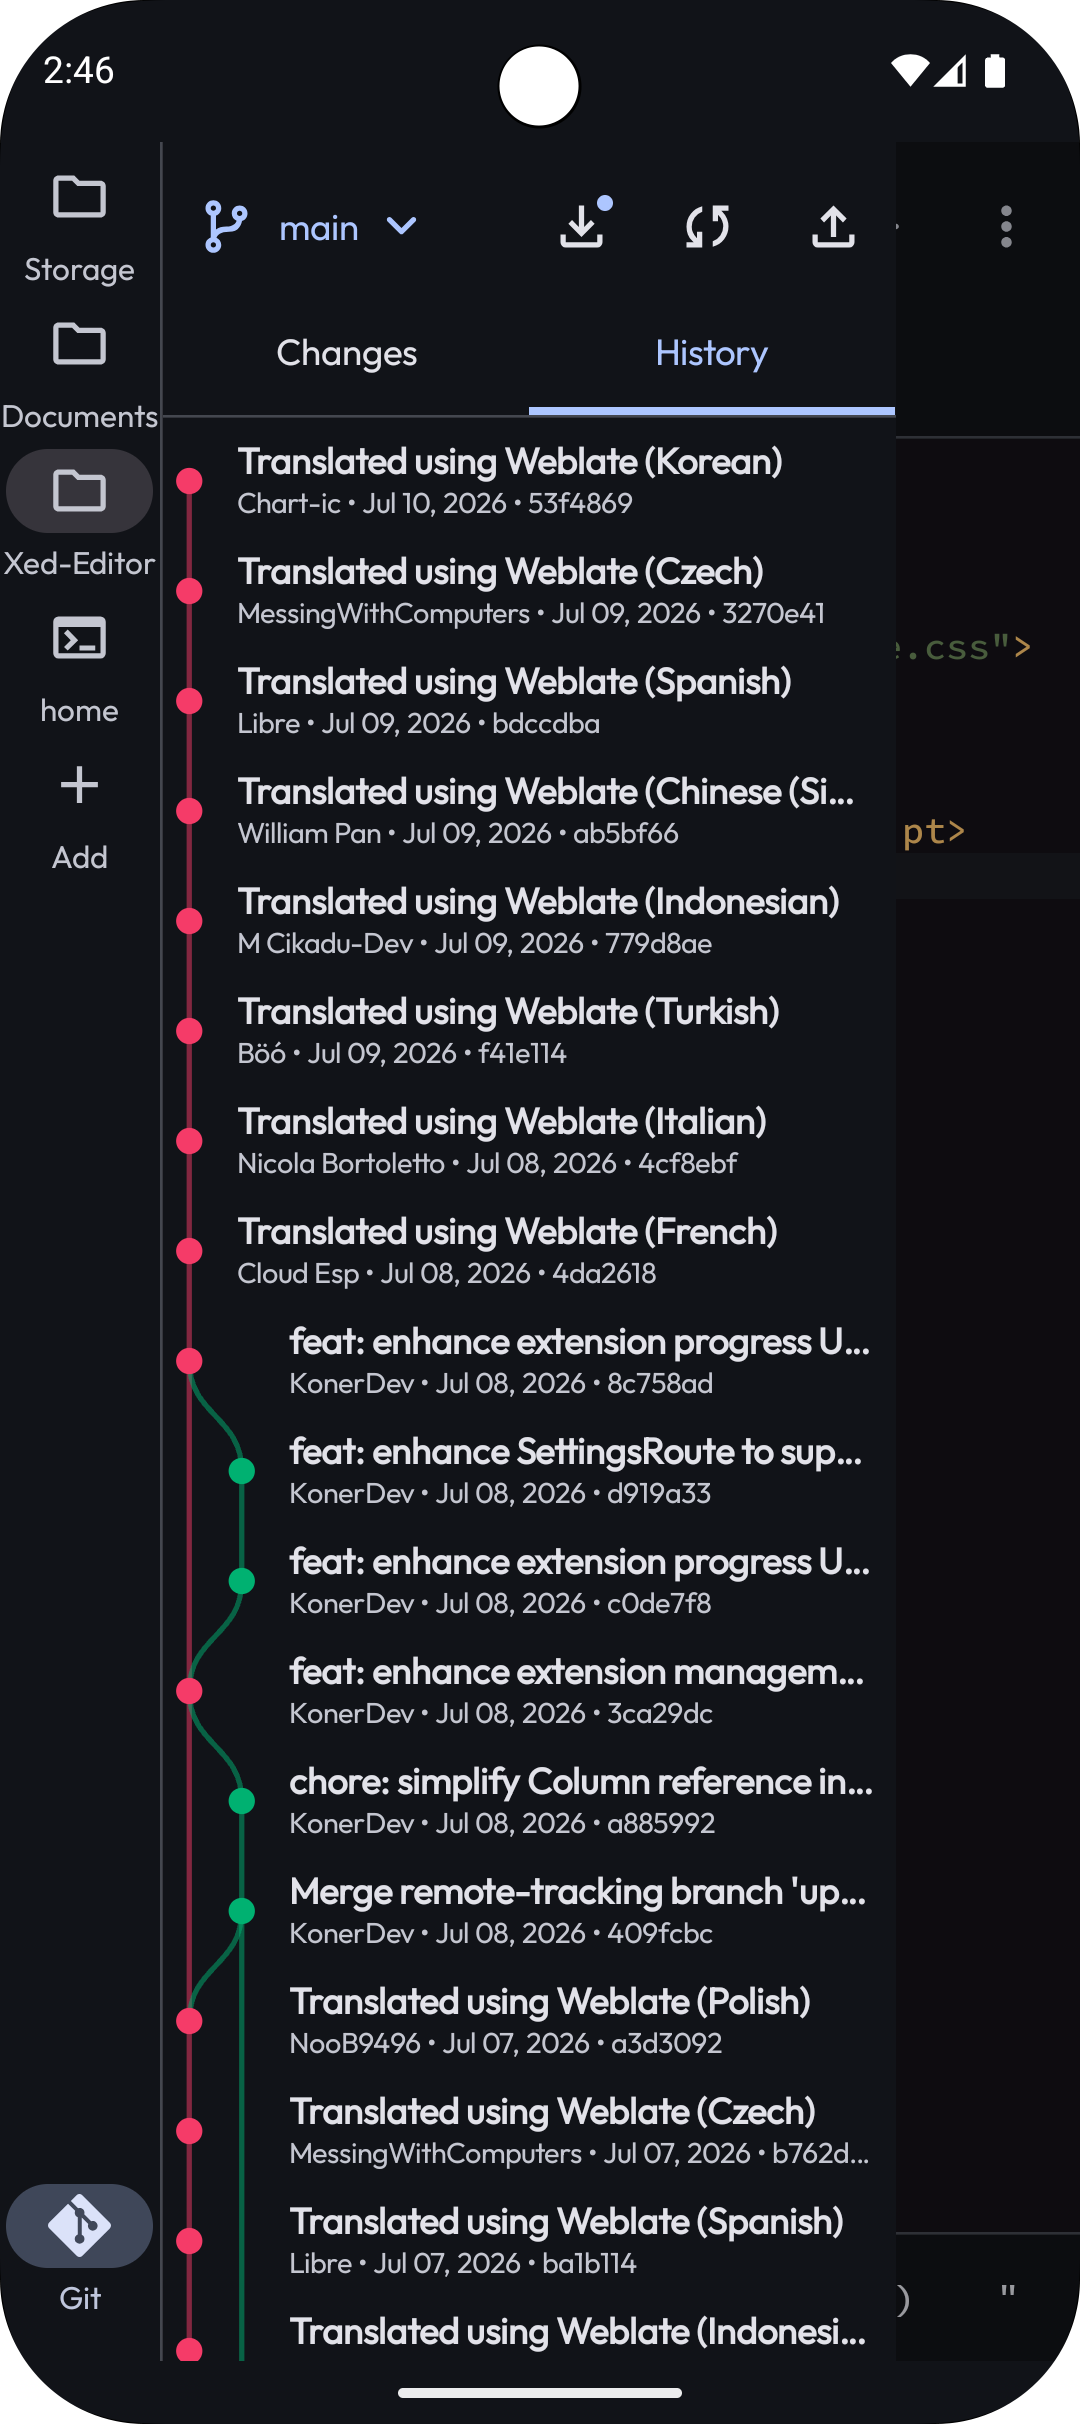
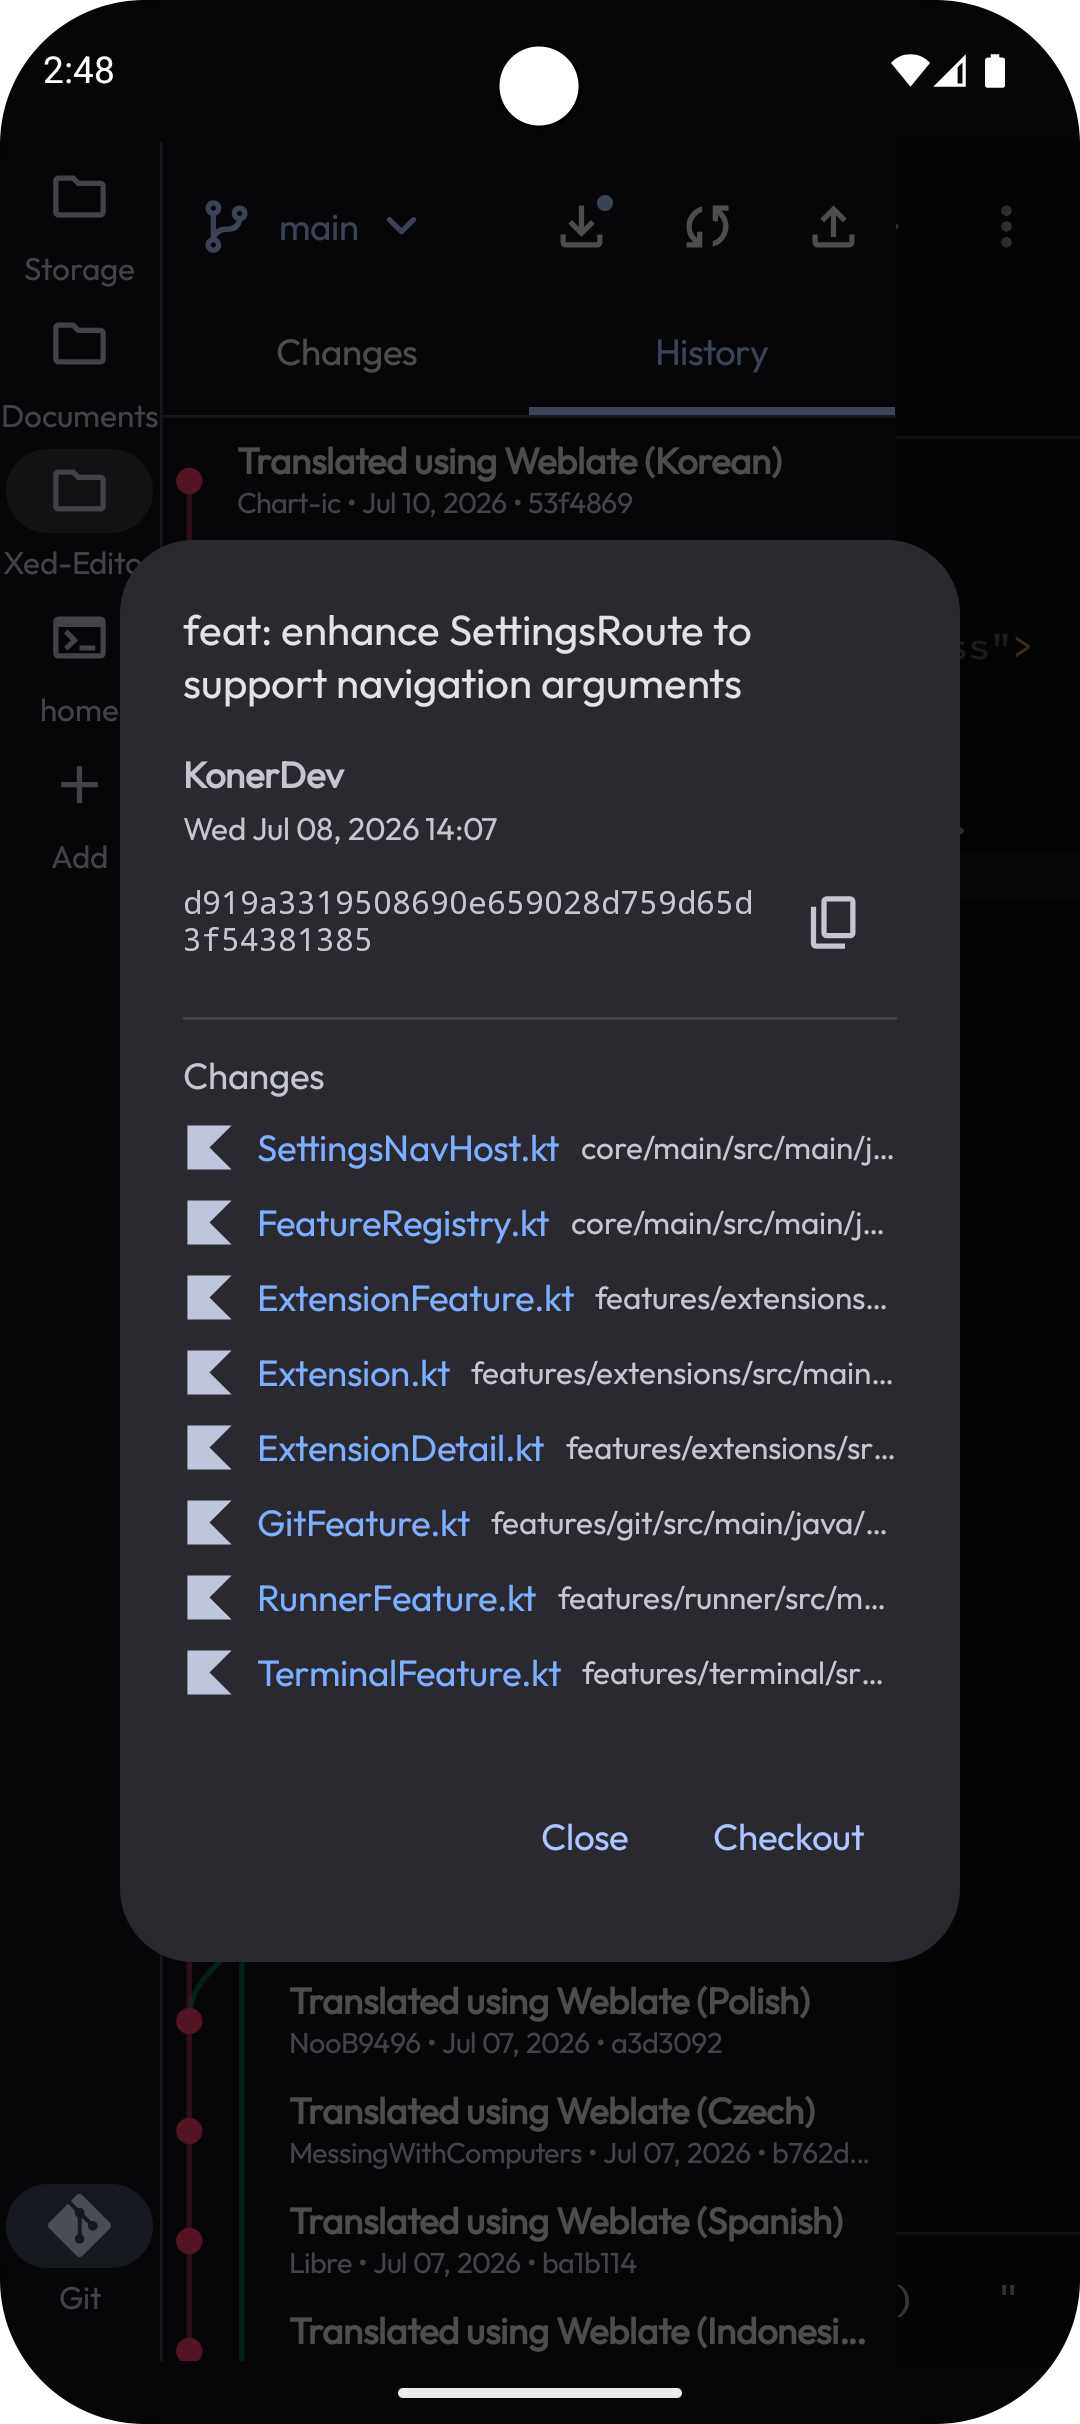
The Git Graph provides a visual history of your project. You can see how branches have evolved, merged, and split over time.
You can open it by tapping on the History tab below the toolbar.
- Commit Details: Tap on any commit in the graph to see its full message, author, date, and a list of all files that were changed in that specific version.
- Explore Changes: Just like in the changes list, you can tap on files within the commit details to view their individual diffs.
Conflict Resolution
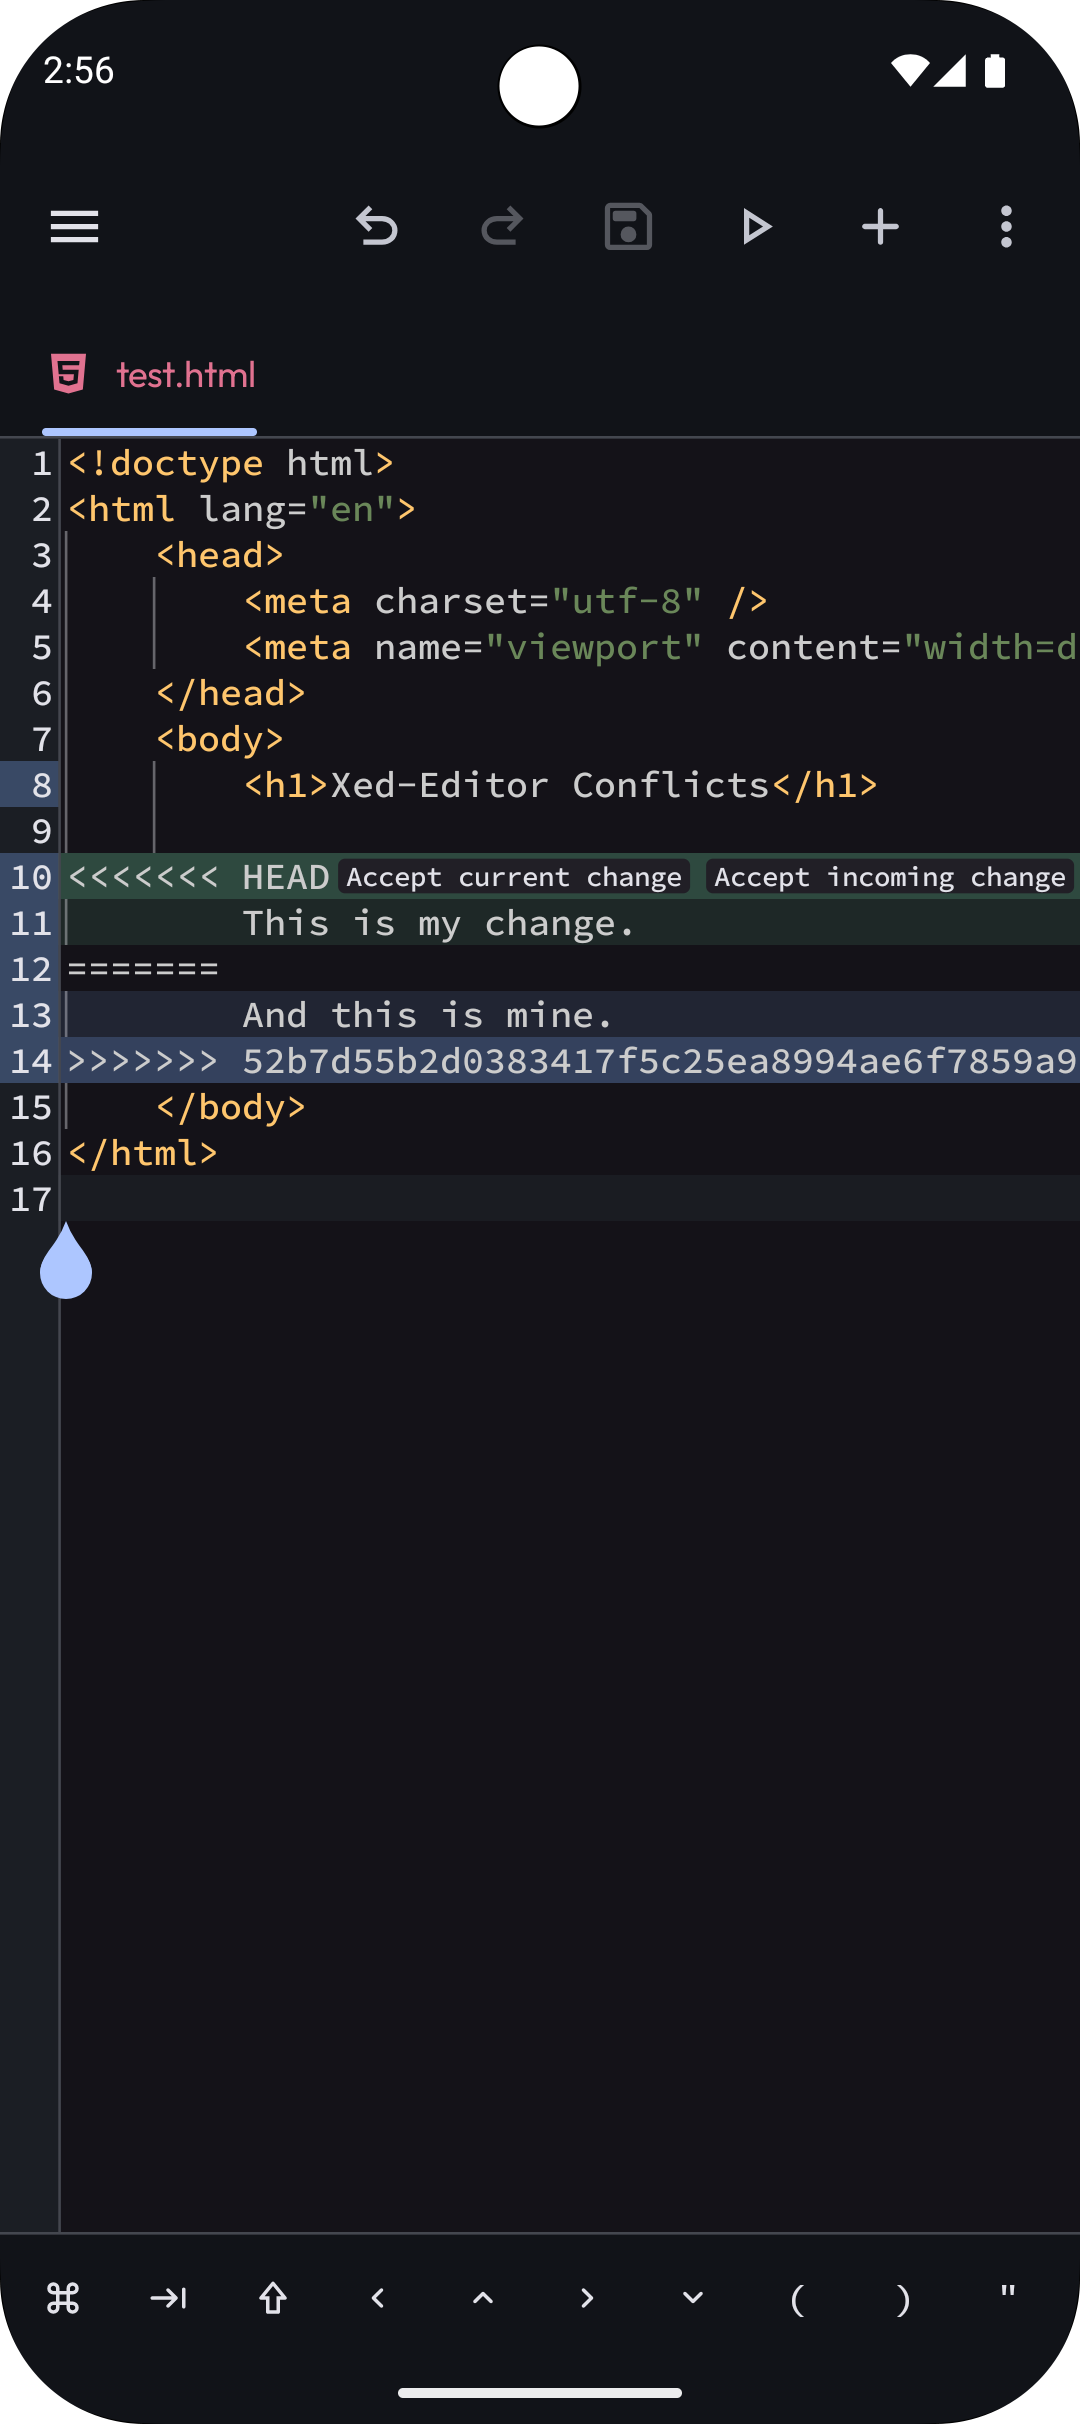
When you pull changes from others that clash with your own work, a "merge conflict" occurs. Xed-Editor makes resolving these easy.
- Ensure Conflict Detection is enabled in Settings → Git.
- When a conflict is detected, Xed-Editor will highlight the conflicting files in the drawer.
- Open the file in the editor. You will see three special buttons that allow you to quickly choose between Accept current change, Accept incoming change, or Accept both changes.
Additional Settings
You can further customize your Git experience in the settings:
- Colorize Files: If enabled, files in the drawer and the tab title will change color based on their Git status.
- Gutter Indication: Highlights the editor's line number panel to indicate which lines have been added, changed, or deleted.
- Submodules: Toggle support for Git submodules and decide if they should be updated recursively.